Learing to Eat
RSS
  • Home
  • About Us
  • Book
    • For Book Clubs
  • Events
  • Press
    • Radio
    • Reviews
  • Contact

Roasted Chili Paste (Nahm prik pao)

January 19, 2011 By caroline in Uncategorized Tags: condiments, Dad's cooking, vegetarian

by Caroline

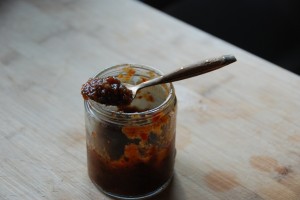
I might like to think that my strawberry pop tarts were the hit of our New Year’s Day party, but it’s Tony’s roasted chili paste that friends are still talking about, and while Tony’s made a couple extra batches to give away, somehow we find ourselves opening the jars and digging in before we can make delivery. I don’t usually even like hot sauces or spicy food, but this is so good, I’ve been dunking broccoli spears into it as a snack, spreading it on crackers, wondering at breakfast when I can eat some next. So as a public service (and so our supply will last a little longer), I’m offering the not-so-secret recipe here, which Tony found in Nancie McDermott’s Real Vegetarian Thai, and is also conveniently posted on line. I’m pasting the recipe in, lightly edited, but do click over to the original to enjoy the talk of feisty coals and palm sugar kisses.

The only ingredient that can be tricky to find (and that involves a particularly time-consuming step) is the tamarind for the tamarind liquid. We’re lucky enough to live near loads of Asian markets, but you can find this ingredient online at one of our new favorite websites (check out those cooking videos!) or use freshly-squeezed lime juice sweetened with a bit of molasses.

* 1/2 cup small dried red chilies such as chiles de Arbol, stemmed, halved crosswise, and loosely packed, about 1/2 ounce
* A generous 1/2 cup unpeeled shallots, cut lengthwise into chunks, about 3 ounces
* 1/4 cup unpeeled garlic cloves (8 to 10 large cloves), about 1-1/2 ounces
* 1/2 cup vegetable oil
* 3 tablespoons palm sugar or brown sugar
* 3 tablespoons Tamarind Liquid (recipe below)
* 1 tablespoon soy sauce
* 1 teaspoon salt

In a wok or a small, heavy skillet, dry-fry the chilies over medium-low heat until they darken and become fragrant and brittle, 3 to 5 minutes. Shake the pan and stir frequently as they roast. Remove from the heat and transfer to a plate to cool.

Increase the heat to medium and dry-fry the shallots and garlic, turning them occasionally, until they are softened, wilted, and blistered, about 8 minutes. Remove from the heat and transfer to the plate to cool.

Stem the chilies and shake out and discard most of the seeds. Crumble the chilies into small pieces. Trim the shallots and garlic, discarding the peel and root ends, and chop coarsely. Combine the chilies, shallots, and garlic in a mini processor or blender and pulse to a coarse paste, stopping to scrape down the sides as needed. Add 1/4 cup of the vegetable oil and grind to a fairly smooth paste. Transfer to a small bowl and set aside.

Pour the remaining 1/4 cup oil into the wok or a skillet. Place over medium heat until a bit of the paste added to the pan sizzles at once, about 1 minute. Add the ground chili paste and cook, stirring occasionally, until the paste gradually darkens and releases a rich fragrance, about 5 minutes. Remove from the heat and set aside to cool to room temperature.

Combine the sugar, tamarind, soy sauce, and salt in a small bowl and stir well. Add this mixture to the cooled chili paste and stir to combine. The paste will be quite oily, and must be well stirred before each use. Transfer to a jar, cap tightly, and refrigerate for up to 1 month. Use at room temperature in recipes or as a condiment.

Makes about 1-1/4 cups

Tamarind Liquid

* 1/2 cup tamarind pulp
* 1 cup warm water

Place the tamarind pulp in a small bowl and add the warm water. Let stand for 20 to 30 minutes, poking and mashing occasionally with your fingers or a spoon to break the sticky lump into pieces and help it dissolve.

Pour the tamarind pulp and water through a fine-mesh sieve into another bowl. Use your fingers or the back of a spoon to work the tamarind pulp well, pressing the softened pulp against the sieve to extract as much thick brown liquid as you can. Scrape the outside of the sieve often to capture the thick purée that accumulates there. Discard the pulp, fibers, and seeds that have collected in the sieve and thin the tamarind liquid with water as needed until it is about the consistency of pea soup.

Use as directed in recipes, or seal airtight and refrigerate for up to 3 days. It sours and sharpens as it stands, so if it has stood for several days, taste it and adjust the flavor with some sugar.

Makes About 1 Cup

Walnuts

January 18, 2011 By lisa in Uncategorized Tags: snacks

by Lisa

One of the great things about eating locally and seasonally is that every few months or so, a “new” food comes into rotation, giving everyone, but especially the kids, a much needed change. When a food comes into season–like cherries or pomegranates or persimmons–it’s almost like a holiday. The kids reminisce about their favorite foods in off-season and look forward to what’s coming next.

One doesn’t often think of nuts as a seasonal product, but they are, and we are lucky enough to have a farmer at our market who brings fresh nuts year round to market.  He brings, from Winters, CA, amazing value-added products like tamari or wasabi or cinnamon, or orange honey almonds; barbecue, lemon-chili, garlic and italian herb pistachios; some nuts are shelled, some unshelled, some are raw, some are roasted, some are salted, some are not.  We’ve yet to meet a nut we don’t like around here, and very often the kids take them for snack to school.

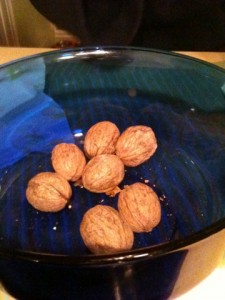
But one of the very best things at this stand are the fresh, unshelled walnuts.  They are markedly different-fresher, more flavorful–than store bought, pre-shelled walnuts. When the new crop comes in, in late winter, I can buy a very large bag of thin-shelled walnuts for just a few dollars. At home, I pour the bag into the bowl that in other seasons holds cherries or plums–and leave out the nutcracker and an empty bowl for shells and let the kids snack on them whenever they want. Ella, especially, cannot get enough. She eats them for snack, for appetizer, for dessert.   And I don’t mind one bit.

The Good Celery

January 14, 2011 By caroline in Uncategorized

by Caroline

Years ago, Tony and I heard a radio ad that was so absurd, it has become a family joke. In the ad, a husband greets his wife with news that he’s fixed the doorbell. His wife is skeptical. “You didn’t use the good celery, did you?”

Now of course any time we use celery, one of us always asks the other about “the good celery.” And it comes in handy other times in the kitchen, too: with chocolate, tortillas, salsa. But we haven’t had reason before to use the phrase the more traditional way, to refer to good china or good silver. That might start to change a bit now.

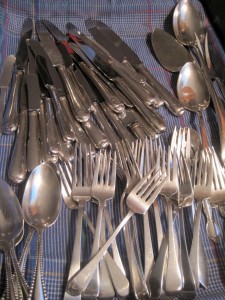
Saturday afternoon, finding myself with some free time between kindergarten basketball and the 3rd grade night hike, I did what any writer with a pressing deadline would do: I started cleaning out the garage. I boxed up some old teaching files, reorganized the Christmas decorations, and then unearthed a sagging cardboard box packed with Tony’s late mother Nancy’s silver.

Nancy gave me some of it, like a fancy tea service she jokingly suggested I use when hosting my writing group. Instead, toddler Ben and I used to play tea party with it. A friend was appalled that I let him bang around with the antiques, but it’s indestructible; much more suited to play than his sweet ceramics.

Other things I’d never seen before, like a child’s complete dinner set (cup, bowl, plate; fork, knife and spoon). The cup has two handles – a perfect 19th century sippy cup – and the spoon is embossed with a smiling moon face. It belonged to Tony’s English grandmother, Frances, and is engraved with her initials and birthdate (October 5th, 1899). I love to imagine her in a highchair, wearing impractical lace, her mother spooning rice cereal out of the wide bowl and into her mouth. There are platters engraved with Tony’s parents’ wedding date, oyster forks and iced tea spoons, a two-part butter dish (a bottom section for ice, a top section for the butter), a pie server, a slotted spoon, two pepper grinders, and enough flatware for a dinner party. It was all tumbled together in the box, next to another box that held dozens of felt storage bags and, conveniently, a tub of silver polish. Some of the utensils are banged up and bent from years of use and brief, inadvertent trips into garbage disposals. None of it’s terribly fancy, but it’s silver so, fancy enough. People used to receive silver for births and weddings, and maybe some still do, but Tony and I don’t live in that world.

Tony and I were given exactly two pieces of silver when we married: a cake knife, hand forged by the friend of a friend; and a small Tiffany cheese knife. They are beautiful and perfect and I use them whenever I can, always thinking of the friends who gave them to us when I do. But otherwise we are not silver people. Like most of our friends, we registered for kitchen basics at Crate & Barrel when we got married, and received a simple flatware set which we’ve used every day for over ten years.

I called my mom after I’d finished unpacking this stash, to get her advice on cleaning it all, and my dad asked, “What will you do with it?” “Use it!” I answered. I’m not expecting to start having fancy tea parties, but the pepper grinders are already established on the dining room table, and I’ll look for ways to use the platters and bowls, too. I don’t think we’ll be breaking out the good silver for pizza night, but I want to bring it into rotation. It’ll certainly raise the bar at family dinner. It will sparkle in the candlelight if I can keep it decently polished. But most of all, it will do something that anything old and beautiful and battered by use can do: inspire conversation. We’ll never know all the stories behind these pieces, but it’s going to be fun to imagine them.

Tropical Blizzard

January 13, 2011 By lisa in Uncategorized Tags: cooking with kids, dessert, Drinks, kidtini

By Lisa

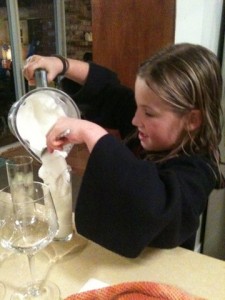
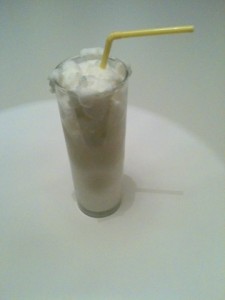
This is an unlikely and unpractical post for the middle of winter if, like me, you’re cold in any state but Hawaii.  But it’s not wholly inappropriate if you’re like my kids, and are not ever bothered by the cold, even in the middle of blizzard.  In an effort to keep my hungry kids out of trouble while I was cooking dinner on Saturday, I had Finn put together a plate of snacks (cheese, crackers, turkey, olives) and let Ella make the kidtinis. The problem was we had no bubbly water and no juice. She concocted a kind of smoothie with milk, ice, and mango and coconut syrups.

I was a skeptical, but the drink was really pretty, and–because she somehow found just the right proportion of milk and ice and syrup–perfectly light and not too sweet. In fact, it was a lot like shave ice.  It melted in the mouth.

Also, it reminded me of first snow. And the blizzard we experienced over vacation. Which was also a beautiful, serendipitous, icy mess.


Tropical Blizzard Smoothie

1 part low fat milk to about 3 parts ice

Equal parts mango and coconut syrups, about 2 T each

Blend in a blender. Adjust syrups to taste.

Glazed Lemon Tea Cake

January 12, 2011 By caroline in Uncategorized Tags: baking, dessert, recipes, sweets, vegetarian

by Caroline

It has been so cold this week — a rare-for-San-Francisco crisp and sunny cold — that all I want to do is stay home curled up on the couch, drinking tea and eating cake. Unfortunately, children need driving to and from school, essays need writing, and other chores interfere with my desire to hibernate. But this cake suits my mood and the season; it’s a lemony, slightly-spicy and lightly-glazed cake with ingredients so basic that you can probably make it without even making a trip to the store.

• 1 stick unsalted butter, room temperature, plus more for pan
• 1 1/2 cups all-purpose flour, plus more for pan
• 1 teaspoon baking powder
• 1/4 teaspoon baking soda
• 1/2 teaspoon salt
• 3/4 cup granulated sugar
• 1 tablespoon finely grated lemon zest plus 6 tablespoons fresh lemon juice (from 2 lemons)
• 3/4 teaspoon ground cardamom
• 2 large eggs
• 1/2 cup sour cream or yogurt
• 1 1/2 cups confectioners’ sugar

Preheat oven to 375 degrees. Butter and flour an 8-inch round cake pan.

Whisk together flour, baking powder, baking soda, and salt.

Beat butter, granulated sugar, zest, and cardamom until pale and fluffy. Add eggs, 1 at a time, beating well after each addition. Beat in 3 tablespoons lemon juice. Add flour mixture in 3 additions, alternating with sour cream or yogurt, beginning and ending with flour. Pour batter into cake pan.

Bake until a toothpick inserted into the center comes out clean, about 30 minutes. Turn out onto a wire rack. Let cool, top side up.

While the cake is cooling, combine confectioners’ sugar with remaining 3 tablespoons lemon juice and whisk until smooth; pour over cooled cake.

Recipe from Martha Stewart

«‹ 65 66 67 68›»

Recent Posts

  • Vegan Chocolate Brownies
  • Polenta with Decadent Mushrooms
  • Tortillas
  • Food & Farm Film Fest!

Now Available

About Us

  • Caroline M. Grant
  • Lisa Catherine Harper

Archives

Tags

appetizers baking book reviews breakfast cassoulet book celebrations chocolate comfort food contributors contributor spotlight cookies cooking with kids Dad's cooking dessert dinner Drinks eating out family dinner farms and farming fast fast food fish fruit gardening with kids holidays ice cream junk food less meat lunch marketing new food Parties picky eaters produce recipes restaurants road food salad sickness snacks sweets travel unfamiliar food vegetables vegetarian
Learning to Eat
© Learning to Eat 2025
Powered by WordPress • Themify WordPress Themes

↑ Back to top