Learing to Eat
RSS
  • Home
  • About Us
  • Book
    • For Book Clubs
  • Events
  • Press
    • Radio
    • Reviews
  • Contact

Dinners Everybody Likes (An Optimistic Series): Pizza!

April 21, 2009 By caroline in Uncategorized Tags: baking, cooking with kids, family dinner, recipes, vegetarian

by Caroline

On the one hand, you might think, “Well, of course everybody likes pizza, what’s not to like?” But that means you do not know about the boys who do not care for tomatoes in any form and the one boy who typically only eats one kind of cheese, a particular brand of Monterey jack cheese, in slices, please, not melted. Once you know about those two limitations on our pizza dinner, you might understand why the meal is a triumph.

Plus, because my kids always eat better when they’ve had a hand in the meal production, we generally make the crust and sauces from scratch (I am seriously considering buying the materials to make homemade mozzarella. I’ll let you know when I do.)  So pizza dinner here is not exactly a quick meal; it’s more like an art project, so we save it for weekends, start early, and take our time.

First, you make the crust. I’ve tried recipes from a number of sources, including The King Arthur Flour cookbook, Gourmet magazine, the Chez Panisse Pasta, Pizza and Calzone cookbook (a recipe that calls, weirdly enough, for milk) and Vegetarian Cooking for Everyone. This past Sunday’s New York Times magazine has a nice piece on homemade pizza (with a crust recipe I’ll try soon) but my favorite comes from Catherine Newman in Wondertime, whose method I have quoted here:

1 envelope (2 1/4 t) active dry yeast

1 3/4 c warm water

pinch of sugar

3 c all purpose white flour

1 c whole wheat flour

1 T wheat germ

1 T ground flax seed

1 T kosher salt

2 T olive oil

Cornmeal to dust your peel or baking pan

It’s nice (but not necessary) to have a pizza stone to bake in the oven, or a barbecue grill, and a wooden peel or cookie sheet to slide the pizzas onto the stone or grill.

Sprinkle yeast over water in measuring cup, add sugar, and let dissolve for about 5 minutes. If any dry yeast remains on the surface after that, stir briefly to mix in. Proceed with one of the following three methods.

Food processor: Pulse flour with wheat germ and flaxseed, if using, and salt. Add oil to yeast mixture and, with processor running, pour liquid slowly into the feed tube. The dough should cohere and form a ball that sits on top of the blade. If it doesn’t, it’s either too wet or too dry, and you should add water or flour accordingly, a tablespoon at a time, pulsing until the ball forms. Scrape dough (it will be sticky) onto a lightly floured counter, sprinkle with flour, and knead 2 or 3 times to form a ball.

Stand mixer: Pour yeast mixture and oil into bowl of mixer. Using paddle attachment, mix in dry ingredients on low speed (adjust dough with flour or water as directed above if it seems too wet or too dry) then switch to dough hook and knead about 5 minutes, until the dough is smooth and springy.

By hand: Pour yeast mixture into a large bowl with oil, and stir in dry ingredients until the mixture coheres into a mass of dough, about 1 minute. Turn dough out onto a lightly floured surface, then knead, adding as little flour as possible, until dough feels smooth and springy — 8 minutes or so.

Next, whichever method you’ve used, place dough in an oiled bowl, cover with plastic wrap, and leave in a warm place to rise for about an hour, or until it doubles in size.

Halfway through the rising time, start preheating your oven or grill to 500.

Once the dough has risen, flour your fist and punch down dough, then turn it out onto a lightly floured counter, knead once or twice, and use a sharp knife to cut it into desired number of pieces — 4 for 12-inch pizzas, 8 for 6-inch pizzas, or some combination. Shape each piece into a smooth ball, cover balls loosely with plastic wrap, and let rest for 5 minutes. At this point you can freeze the dough if you like; it also keeps fine in the refrigerator for a few days — just bring to room temperature before using.
dough-balls
Now back to Caroline: Shaping the dough is where it gets fun for the kids, and I have to let mine play with the dough for a few minutes before we get serious about crust. You can let them experiment with braids and snail shapes, and there’s nothing wrong with baking a few of these oddly-shaped breadsticks on the side. Once everyone’s ready to move on, use the heels of your hands or a rolling pin to flatten dough, then hold it down in the middle with one hand while moving the other hand around the edge, pulling it gently outward. If the dough resists or starts to spring back when you let go, let it rest for a few minutes. You can also try holding the dough up and letting gravity pull it down. Pull and stretch until the dough is 1/4 inch (or less) thick. Pinch closed any holes as they develop.  Don’t worry if the dough isn’t perfectly even or perfectly round; it’s going to taste terrific no matter what it looks like.
kneading

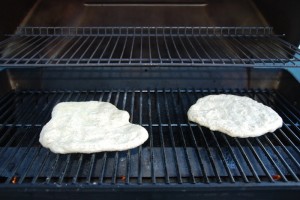
Once the dough is shaped, transfer it  onto a wooden pizza peel or cookie sheet that has been dusted with cornmeal (if you’re using a pizza stone or grill) or onto a pan that has been brushed with olive oil, then sprinkled with 2 tablespoons cornmeal. If you’re grilling the pizza, you need to bake the pizza crust before topping it:
dough-on-grill
Just slide the dough onto the grill (it won’t seep through the grates, nor will it stick if the grill is good and hot), and bake (with the lid of the grill open) until browned on the bottom. Slide off the grill, flip, and top the baked side. If you’re baking the pizza in the oven, you don’t need to take this extra step; just slide the topped pizza into the oven and bake 15 minutes or so until browned and bubbly.

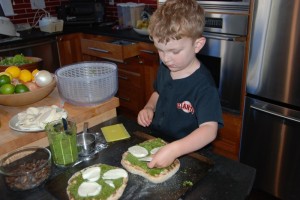
assembling

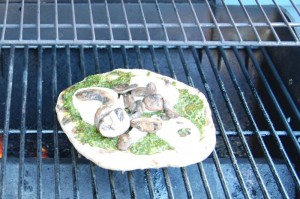
We top our pizzas with pesto, tomato sauce, fresh mozzarella, sauteed mushrooms and caramelized onions. In the summer, we top dessert pizzas with cinnamon and brown sugar and sliced peaches; sliced bananas would work nicely, too. There’s no bad pizza topping in my book, really, go ahead and experiment. If you’re barbecuing the pizzas, close the grill when you bake the topped pizzas:

pesto-pizza-on-grill

pizzas-on-grill

The finished product:

pizzas-on-peel

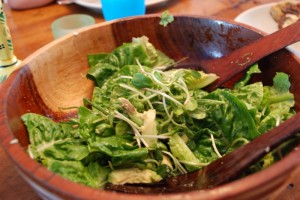
And then add a  salad and you’ve got a beautiful family supper.

salad

Banana Bread Today (or, Another Field Trip, Another Batch of Muffins)

April 16, 2009 By caroline in Uncategorized Tags: baking, breakfast, recipes, snacks, sweets

by Caroline

dsc_0001
As I have written elsewhere, there’s always room in my repertoire for one more banana bread recipe; this one I found originally in The Baker’s Dozen Cookbook and have been tinkering with it (reducing the fat and sugar, upping the protein) ever since. You can make these as a quick bread (bake for about an hour) or muffins (bake for about 25 minutes); either way, they are banana-y, buttery and delicious.

Note: you can certainly make this with 1-1/4 c all purpose flour (omitting the whole wheat flour and wheat germ) and with 8 T (one stick) of butter (omitting the flax seed), and it’ll be delicious, just not so virtuous.

2-3 ripe bananas (about 1 cup, mashed)
3/4 c all purpose flour
1/4 c whole wheat flour
1/4 c wheat germ
9 T ground flax seed
1 t baking soda
1/2 t salt
3/4 c brown sugar
5 T butter
2 eggs
1/2 c chopped walnuts (optional)

Preheat the oven to 350 and grease an 8″ x 4″ loaf pan or a 12-cup muffin tin.

Mash the bananas in a medium bowl until pretty smooth.

Whisk the flours, wheat germ, flax seed, baking soda, and salt in another bowl.

Using the flat whisk in a stand mixer, mix the sugar and butter well to make a stiff paste (you can also do this by hand, of course). Beat in the eggs one at a time, mixing well after each addition. Mix in the mashed banana. Stir in the walnuts, if using (don’t worry if the batter looks curdled). Now add the flour mixture and stir until just blended (don’t overmix or worry about a few lumps). Put the batter in the prepared pan.

Bake until a skewer comes out clean, about 45 minutes to an hour for bread, 25 minutes for muffins. Cool on racks in the baking pan for 10 minutes, then remove from the pans and cool completely.

My Favorite Appliance (with a recipe!)

April 14, 2009 By caroline in Uncategorized Tags: family dinner, recipes, vegetarian

by Caroline

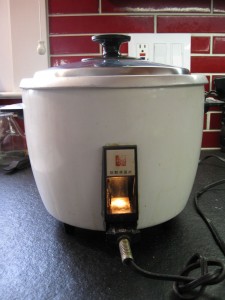
My rice cooker, doing its thing

Some time ago, we renovated the kitchen here and replaced creaky old appliances with spiffy new energy-efficient models. The dishwasher purrs quietly and uses a fraction of the water our old one required; the oven heats quickly and keeps its heat inside, unlike its poorly-insulated predecessor; the refrigerator maintains a steady temperature and beeps if a door is inadvertently left open.

But the beep seems to be a common feature of these new appliances, and the beep is not something I love.  The fridge beeps, the oven beeps (when temperature is set and when said temperature is achieved), and worst of all, the smallest of all, the toaster oven beeps every time you touch a button. Good consumers that we are, we researched this modest purchase, too, for energy efficiency, effectiveness, cost, and found a model that fit our budget and our kitchen counter. But nowhere in the reviews, not in Consumer Reports nor Cooks Illustrated nor Epinions, did anyone mention the beep. And you can’t just push a button or turn a dial to start this toaster up, you must select Function (beep!), Time (beep!) and then it announces when it has begun (beep beep!) and finished (beep-beep-beep-beep!)

We can’t make it stop.

And this makes me love my quiet old rice cooker all the more. My mother bought this at a church tag sale when we lived in Japan, so it is at least forty years old. It may once have done other things but cook rice — most rice cookers now do — but I no longer have the directions nor any of the inserts. Which is fine, because all I want it to do is steam rice for my family’s dinner, and it does that beautifully, whether I use short grain or Basmati, half quinoa or part brown rice. A light turns on when I press the button, and clicks satisfyingly ten or fifteen minutes later when the rice is cooked. It then thoughtfully keeps the rice warm until we are ready to eat.

And when we are ready to eat, we often serve the rice with whatever vegetable’s handy and then this tofu, an adaptation of a recipe in Deborah Madison’s Vegetarian Cooking for Everyone, which is quick and delicious:

Caramelized Golden Tofu

1 pound of firm tofu, cut into 1-inch cubes
2 T peanut oil

2 T soy sauce
3 1/2 T brown sugar

Drain the tofu and, if you have the time, blot it a bit with paper towels. Heat the oil in a medium nonstick skillet over fairly high heat. Add the tofu and fry until golden. It takes a few minutes to color, so let it cook undisturbed while you do something else (really! leave it alone!) then come back and turn the pieces over. Don’t let them get dry and hard, but 5-6 minutes a side should give them some nice color. Remove the tofu from the pan, turn the heat down to medium, and put in the soy sauce and brown sugar. Whisk them together a bit and then add the tofu. Toss well, simmer for  a couple minutes, then add a few tablespoons of water and cook till the sauce coats the tofu nicely. Turn off the heat; let the tofu sit in the syrup until you’re ready to serve.

Muffins For the Road (Vegan Banana Wheat Germ)

April 1, 2009 By caroline in Uncategorized Tags: baking, breakfast, cooking with kids, recipes, road food, snacks

dsc_0075by Caroline

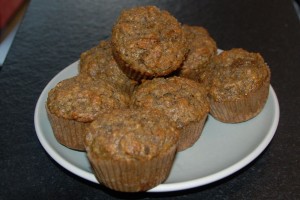
I have lost count of the number of field trips Ben’s first grade class has taken this spring, and we’re not done yet, and I seem to be driving them all. I’m not complaining; I’m not a committee mom — you won’t find me organizing this fund-raising gala or that anniversary celebration– I like to do the things that involve the kids most directly. I volunteer in the lunch room (more on that in a later post), I help out with messy art projects, and I drive field trips. And when I do, I bring muffins, because it seems no matter how short the drive might be (a recent trip to the symphony clocked in at about 7 minutes) it seems that as soon as the car doors are closed and the buckles are buckled, somebody’s hungry. A good muffin can satisfy hunger pangs and raise morale on a longer drive. Plus, although I have no particular guilt about offering my kids sweeter baked treats (I’m not as organized about it as Lisa, but I, too, let them eat cake), I haven’t found anyone yet who objects to a muffin. These are what I brought along on our farm field trip the other day, and they gave the car a nice banana scent, too.

1 c plain soy milk
1 t apple cider vinegar
2 very ripe bananas
1/3 c canola oil (I scanted the vegetable oil slightly and added a splash of walnut oil)
1/3 c sugar
1 t vanilla extract
1 1/4 c flour (I used a mix of all-purpose and whole wheat flours)
3/4 c wheat germ
1 T cinnamon
2 t baking powder
1/2 t salt

Preheat the oven to 375 and line a 12-cup muffin tin with muffin papers, or lightly grease the cups.

Combine the soy milk and vinegar and set aside for a minute or two to curdle.

Meanwhile, mash the bananas in a large mixing bowl, then add the soy milk mixture along with the oil, sugar, and vanilla. Mix well.

In a separate bowl, combine the flour, wheat germ, cinnamon, baking powder and salt. Add this to the banana mixture and mix until just combined. Spoon batter into the muffin cups and bake for 22 minutes. Let the muffins cool in the pan for a couple minutes, then transfer to a rack to cool completely. My first batch didn’t last that long…

Limoncello Party

March 31, 2009 By lisa in Uncategorized Tags: crema di limoncello, crema di orangecello, Drinks, limoncello, orangecello, Parties, produce, recipes

p1090329

by Lisa

Ever since we’ve had a lemon tree, and more lemons than we knew what to do with, I’ve been making limoncello–a lemon liqueur made from steeping the zest of fresh lemons in grain alcohol, then mixed with simple syrup and more alcohol. It hails originally from Sorrento in Southern Italy.  It’s strong and fragrant and a gorgeous bright yellow. Served ice cold in warm weather, it’s just about one of the best things you’ll ever drink.

When we bought our house, it came with an excellent old orange tree, so orangecello was added to my spring brewing. ThenI discovered crema di limoncello and crema di orangecello (in which sweetened milk is added to the steeping zest; think: creamsicle for adults) and my house in spring began to look a bit like a small artisinal distillery.  The word spread.

If you’ve been reading this blog for any length of time, you know I like parties of any kinds, and that we live in an Eichler, which is pretty much designed for entertaining.  So it was natural that last year, when lemons were in full season, I held a brewing party for my girlfriends, who also like a good party, all the more if it can provide them with delicious hooch for the year–which also happens to make really excellent gifts for Christmas if you can manage to keep it in the house that long.   So, what was our family tradition became a communal event, and because of when it takes place, it really does feel like we’re welcoming spring and looking straight into the mouth of summer  There are so many of us now, that the brewing has taken on a life of it’s own.  My kids know that the recipe will be passed on to them when they’re (much) older, the husbands and siblings and grandparents look forward to the fresh batches, which we all drink at holidays and family dinners or just whenever.   There’s more than one story of a batch mysteriously “disappearing” after a relative’s visit.  And for now Ella and Finn know that limoncello season means lots of fresh lemonade and orange juice for them, and one of my Italian friends got her kids in on the zesting action in her home.  Even Finley, this year, when he saw me zesting oranges instead of lemons wondered, “You making limoncello with oranges? Yum!”

For the party, I supplied the recipe and know how, as many oranges as my friends could pick off my tree, the last of my previous year’s limoncello for tasting, some prosecco for mixing and drinking straight, and my friends brought their lemons and alcohol and a dish to share and we zested and juice and ate and drank all afternoon.

It’s an excellent party:  easy, fun, productive.  This year  my friends branched out:  some started a batch of crema, some added vanilla beans (which I always do to my cremas and meyer lemon batches), they use different vodkas, etc.  There’s basically a recipe for every family, which is how it should be.

p1040546

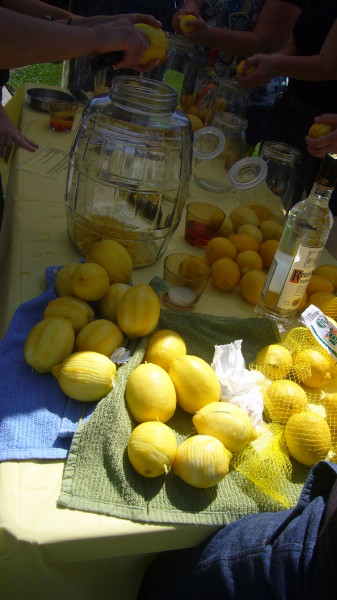
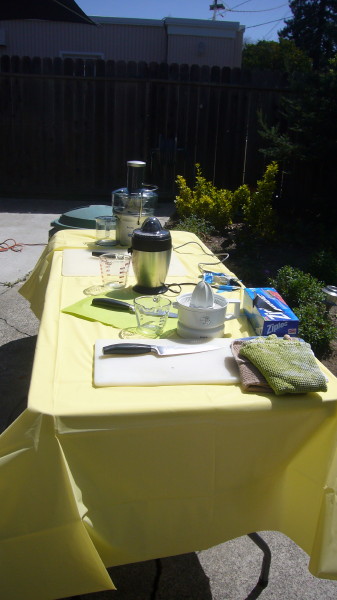
I set up one zesting station, with 6 zesters, where everyone took turns zesting into their large glass jars.  At another station, set up with 3 juicers (2 were mine, one brought by a friend), we juiced the zested citrus and brought the juice home in freezer ziplock bags, which I provided.  I freeze my lemon juice in ice cube trays, then the kids can mix it with simple syrup and bubbly (or plain) water all summer long for fresh lemonade.  Call it the recessionary party, but we’ve been doing it this way for years.

p1090334

I also laminate the recipe cards, with the recipe on one side and serving suggestions on the other, which is what I’ve reproduced below.  It’s not too late for you to brew.  Especially with friends.

p1090333

Italian Limoncello

20 organic lemons

2 bottles (750 ml) 100-proof vodka or Everclear

4 cups sugar

5 cups water

Note: Don’t be afraid of the Everclear if you can find it.  It’s stronger than regular vodka and has less flavor of it’s own. This means it extracts more of the flavor and essential oils from the zest and imparts less of its own taste to the finished product. It also doesn’t get slushy in the freezer. Organic, unsprayed fruit is essential. You don’t want to be drinking chemicals.

Step One: Wash the lemons with a vegetable brush and hot water to remove any residue; pat the lemons dry. In a large glass jar (1-gallon jar), add one bottle of vodka.

Carefully zest the lemons with a zester or vegetable peeler so there is no white pith on the peel. Add the lemon zest to the vodka as it is zested. NOTE: Use only the outer part of the rind. The pith, the white part underneath the rind, is too bitter and would spoil your limoncello.

Cover the jar and let sit at room temperature for at least 10 days and up to 40 days in a cool dark place. The longer it rests, the better the taste will be. (You can shake or stir a little every few days, if you like.) As the limoncello sits, the vodka will slowly take on the flavor and rich yellow color of the lemon zest. When the color is no longer deepening and the rinds look whitish, it is definitely done.

Step Two: In a large saucepan, combine the sugar and water; cook until dissolved, or until thickened if you want a thicker, sweeter drink, approximately 5 to 7 minutes.

Let the syrup cool, then add it to the Limoncello mixture from Step One. Add the additional bottle of vodka. Allow to rest for another 10 to 40 days.

Step Three: After the rest period, strain the liquid through a cheese cloth or coffee filter and bottle: discard the lemon zest. Keep in the freezer until ready to serve.

Limoncello variations…

  • · To original recipe, add zest of 1 lime
  • · To original recipe, made with either lemons or oranges or meyer lemons, add one whole, split vanilla bean during steeping
  • · Substitute lemon zest with zest from Meyer lemons or 10 oranges or blood oranges
  • · Substitute lemon zest with dry, unwashed organic basil leaves to make basilcello (wipe dust off leaves with dry cloth)
  • · Use zest of 30 lemons & 5 vanilla beans (insides scraped, beans and seeds used) for initial steeping
  • · Experiment with vodkas and the amount of sugar in the simple syrup, you can make a mellower or sweeter or less sweet liquer
  • · Try Crema di Limoncello/Orangecello, a creamy version of this drink: steep 2 vanilla beans in 750 ml. warm milk, add sugar and stir until dissolved. Cool completely. Substitute this milk mixture for the simple syrup. Or, steep the zest right with the vanilla beans, then add the milk/sugar mixture. Don’t use the second bottle of alcohol. Many other variations for this recipe for this are available online. When I make my crema, I just split, scrape and steep one vanilla bean with the first bottle of alcohol and zest.  I love the flecks of vanilla in my drink.

& Serving Suggestions

  • · Drink ice cold
  • · Drink ice cold with ice chips
  • · Drink ice cold mixed with mineral water or prosecco or any other sparkling beverage
  • · Drizzle over shaved ice
  • · Drizzle over ice cream
  • · Drizzle over pound cake or fresh summer berries
  • · Mix with prosecco and vanilla or lemon gelato to make a Venetian shake
  • · Mix with iced tea
  • · Label & “brand” to give as gifts

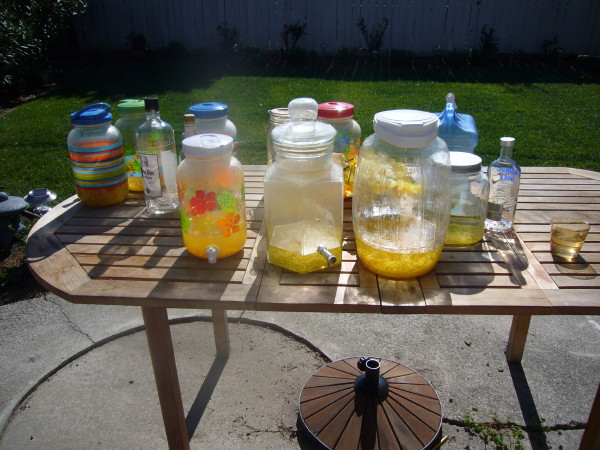
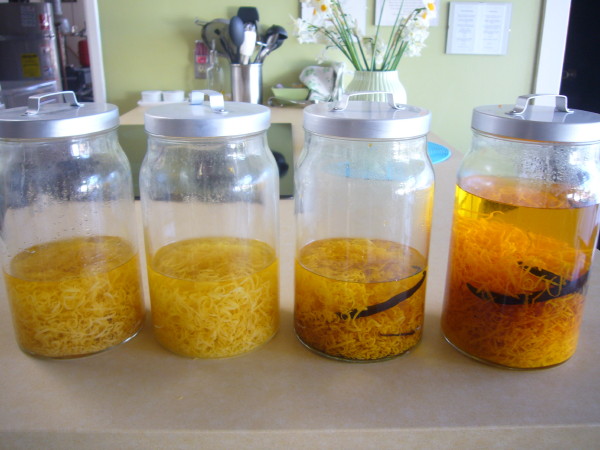
My batches thus far for this year:  lemon, lemon for crema, meyer lemon w/vanilla bean, double batch of orange w/vanilla bean for crema di orangecello:

p1090338

«‹ 113 114 115 116›»

Recent Posts

  • Vegan Chocolate Brownies
  • Polenta with Decadent Mushrooms
  • Tortillas
  • Food & Farm Film Fest!

Now Available

About Us

  • Caroline M. Grant
  • Lisa Catherine Harper

Archives

Tags

appetizers baking book reviews breakfast cassoulet book celebrations chocolate comfort food contributors contributor spotlight cookies cooking with kids Dad's cooking dessert dinner Drinks eating out family dinner farms and farming fast fast food fish fruit gardening with kids holidays ice cream junk food less meat lunch marketing new food Parties picky eaters produce recipes restaurants road food salad sickness snacks sweets travel unfamiliar food vegetables vegetarian
Learning to Eat
© Learning to Eat 2025
Powered by WordPress • Themify WordPress Themes

↑ Back to top