by Caroline
On the one hand, you might think, “Well, of course everybody likes pizza, what’s not to like?” But that means you do not know about the boys who do not care for tomatoes in any form and the one boy who typically only eats one kind of cheese, a particular brand of Monterey jack cheese, in slices, please, not melted. Once you know about those two limitations on our pizza dinner, you might understand why the meal is a triumph.
Plus, because my kids always eat better when they’ve had a hand in the meal production, we generally make the crust and sauces from scratch (I am seriously considering buying the materials to make homemade mozzarella. I’ll let you know when I do.) So pizza dinner here is not exactly a quick meal; it’s more like an art project, so we save it for weekends, start early, and take our time.
First, you make the crust. I’ve tried recipes from a number of sources, including The King Arthur Flour cookbook, Gourmet magazine, the Chez Panisse Pasta, Pizza and Calzone cookbook (a recipe that calls, weirdly enough, for milk) and Vegetarian Cooking for Everyone. This past Sunday’s New York Times magazine has a nice piece on homemade pizza (with a crust recipe I’ll try soon) but my favorite comes from Catherine Newman in Wondertime, whose method I have quoted here:
1 envelope (2 1/4 t) active dry yeast
1 3/4 c warm water
pinch of sugar
3 c all purpose white flour
1 c whole wheat flour
1 T wheat germ
1 T ground flax seed
1 T kosher salt
2 T olive oil
Cornmeal to dust your peel or baking pan
It’s nice (but not necessary) to have a pizza stone to bake in the oven, or a barbecue grill, and a wooden peel or cookie sheet to slide the pizzas onto the stone or grill.
Sprinkle yeast over water in measuring cup, add sugar, and let dissolve for about 5 minutes. If any dry yeast remains on the surface after that, stir briefly to mix in. Proceed with one of the following three methods.
Food processor: Pulse flour with wheat germ and flaxseed, if using, and salt. Add oil to yeast mixture and, with processor running, pour liquid slowly into the feed tube. The dough should cohere and form a ball that sits on top of the blade. If it doesn’t, it’s either too wet or too dry, and you should add water or flour accordingly, a tablespoon at a time, pulsing until the ball forms. Scrape dough (it will be sticky) onto a lightly floured counter, sprinkle with flour, and knead 2 or 3 times to form a ball.
Stand mixer: Pour yeast mixture and oil into bowl of mixer. Using paddle attachment, mix in dry ingredients on low speed (adjust dough with flour or water as directed above if it seems too wet or too dry) then switch to dough hook and knead about 5 minutes, until the dough is smooth and springy.
By hand: Pour yeast mixture into a large bowl with oil, and stir in dry ingredients until the mixture coheres into a mass of dough, about 1 minute. Turn dough out onto a lightly floured surface, then knead, adding as little flour as possible, until dough feels smooth and springy — 8 minutes or so.
Next, whichever method you’ve used, place dough in an oiled bowl, cover with plastic wrap, and leave in a warm place to rise for about an hour, or until it doubles in size.
Halfway through the rising time, start preheating your oven or grill to 500.
Once the dough has risen, flour your fist and punch down dough, then turn it out onto a lightly floured counter, knead once or twice, and use a sharp knife to cut it into desired number of pieces — 4 for 12-inch pizzas, 8 for 6-inch pizzas, or some combination. Shape each piece into a smooth ball, cover balls loosely with plastic wrap, and let rest for 5 minutes. At this point you can freeze the dough if you like; it also keeps fine in the refrigerator for a few days — just bring to room temperature before using.
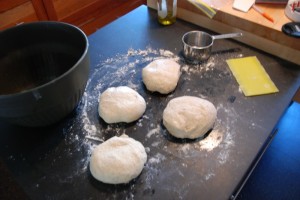
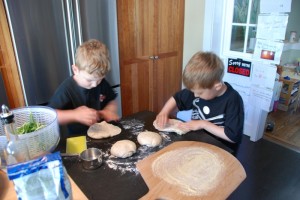
Now back to Caroline: Shaping the dough is where it gets fun for the kids, and I have to let mine play with the dough for a few minutes before we get serious about crust. You can let them experiment with braids and snail shapes, and there’s nothing wrong with baking a few of these oddly-shaped breadsticks on the side. Once everyone’s ready to move on, use the heels of your hands or a rolling pin to flatten dough, then hold it down in the middle with one hand while moving the other hand around the edge, pulling it gently outward. If the dough resists or starts to spring back when you let go, let it rest for a few minutes. You can also try holding the dough up and letting gravity pull it down. Pull and stretch until the dough is 1/4 inch (or less) thick. Pinch closed any holes as they develop. Don’t worry if the dough isn’t perfectly even or perfectly round; it’s going to taste terrific no matter what it looks like.
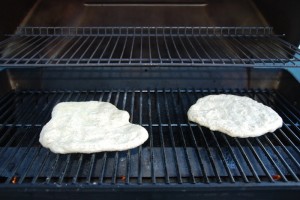
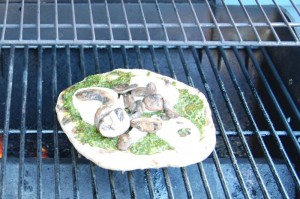
Once the dough is shaped, transfer it onto a wooden pizza peel or cookie sheet that has been dusted with cornmeal (if you’re using a pizza stone or grill) or onto a pan that has been brushed with olive oil, then sprinkled with 2 tablespoons cornmeal. If you’re grilling the pizza, you need to bake the pizza crust before topping it:
Just slide the dough onto the grill (it won’t seep through the grates, nor will it stick if the grill is good and hot), and bake (with the lid of the grill open) until browned on the bottom. Slide off the grill, flip, and top the baked side. If you’re baking the pizza in the oven, you don’t need to take this extra step; just slide the topped pizza into the oven and bake 15 minutes or so until browned and bubbly.
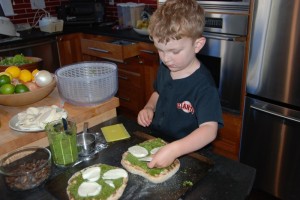
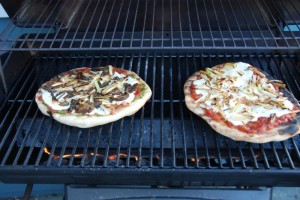
We top our pizzas with pesto, tomato sauce, fresh mozzarella, sauteed mushrooms and caramelized onions. In the summer, we top dessert pizzas with cinnamon and brown sugar and sliced peaches; sliced bananas would work nicely, too. There’s no bad pizza topping in my book, really, go ahead and experiment. If you’re barbecuing the pizzas, close the grill when you bake the topped pizzas:
The finished product:
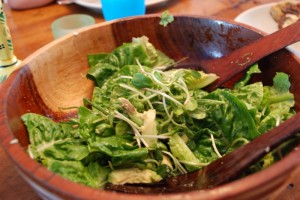
And then add a salad and you’ve got a beautiful family supper.


Topics about Vegan-food » Learning To Eat » Archivio » Dinners Everybody Likes (An …
April 21, 2009 @ 11:57 pm
[…] caroline placed an observative post today on Learning To Eat » Archivio » Dinners Everybody Likes (An …Here’s a quick excerptI’ve tried recipes from a number of sources, including The King Arthur Flour cookbook, Gourmet magazine, the Chez Panisse Pasta, Pizza and Calzone cookbook (a recipe that calls, weirdly enough, for milk) and Vegetarian Cooking for … […]
lisa
April 23, 2009 @ 11:01 am
We do this pretty much every Friday…though not on the grill in the winter! & I agree that the grill easily makes the best pie, at least for us since we’re all very partial to the thinnest crust we can manage–I’m still a New Yorker at heart & I’ve converted the deprived West Coast babies (husband included). My crust is different, so maybe one week this summer I’ll post my (admittedly purist recipe) and our clan in action. Love the pics!
Learning To Eat » Archivio » Feeding the sick
October 14, 2009 @ 9:55 pm
[…] a family-favorite pizza: pesto and roasted potato. Arizmendi makes a different pizza every day, and while we all love to make pizza from scratch, this was not the day for that. Instead, we let our bakery friends do the cooking, and saved our […]